Garden Wedding Cakes
|
The Story behind this Cake
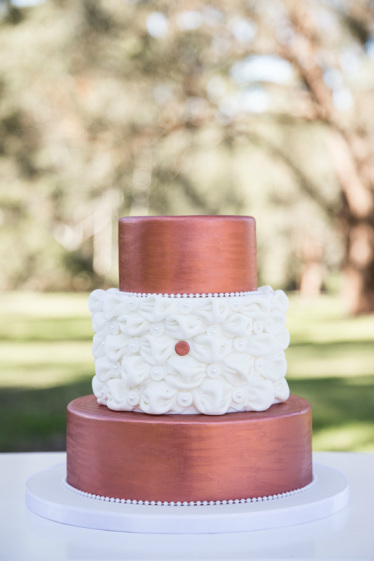
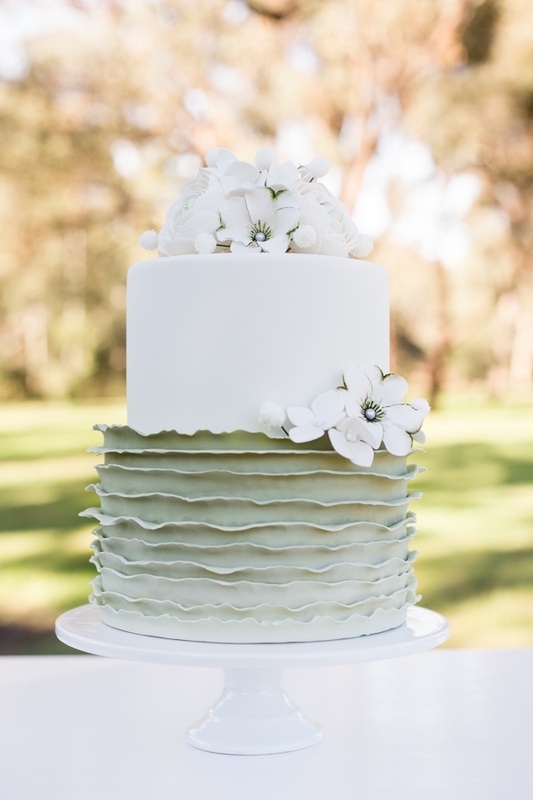
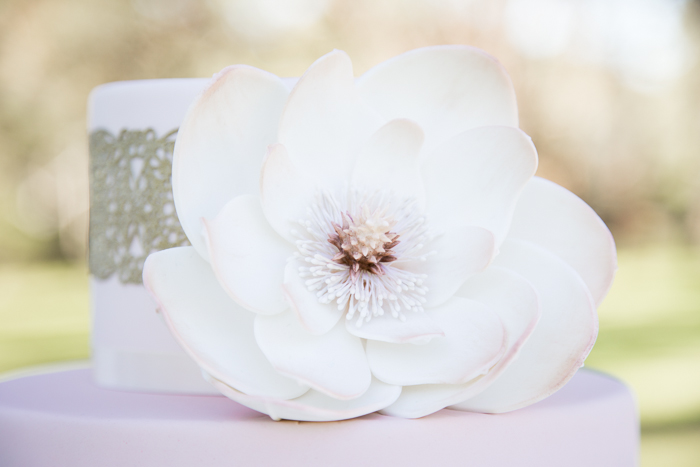
This collection of cakes were produced for a photo shoot based on the theme 'garden weddings' .
I tried to add lots of different textures and finishes to each cake separately to show the amazing techniques that are available to everyone these days! What's inside these cakes? It isn't actually cake at all its styrofoam! A brilliant way to create a cake suitable for a photo shoot (being outside/moved around a lot!) The first cake is the copper lustre cake with the billowing technique used again for the centre tier (check out my other post and find information on that) the other tiers were painted with copper lustre mixed with rose essence. To do this ice your cake and leave it overnight to 'set' I find this to be a great trick as the icing will not dint/mark if you accidentally bump or press the paintbrush on too hard! I then mix the powder in the lid of the lustre dust (I also do this because once you have finished, leave the lid open and wait for the remaining rose essence to evaporate you can then put the lid back on and re use it next time-no wasting fairly expensive lustre. Ok so mix a lid amount of lustre and rose essence to make consistency of single cream and start to paint it directly onto the pre iced cake, use small quick strokes and re load your brush as needed! I will use quite a lot of lustre but try and be consistent with the strokes as this shows when different light hits different angles of the finished cake! Repeat on the other tier and stack! I also placed this onto a thick MDF iced board like I do with all of my cakes to give it a sturdier platform to sit on! The green Ombre ruffle effect cake is perfect for the theme and handmade sugar Ranunculus flowers and coconut balls really create a fresh look. To create the Ombre ruffles I turned to youtube and found a tutorial to follow. The pasta machine really helps and takes the hard work out of this technique, an unconventional cake decorating tool but a handy one to have. The top tier I iced as normal and the sugar flowers were made in a class run by Sweet temptation by Jen, based in Adelaide she is a true sugar flower artist and an amazing teacher! The coconut balls however I rolled up balls of fondant, took a 20 gauge green wire heated up the end with a candle lighter and popped the ball on top! This will help the fondant stick to the wire as it is quite thick and hard to loop the end! I then painted the ball with sugar glue and rolled it is fine desiccated coconut! The 3rd cake is very simple (The majority of the work went into the stunning Magnolia flower) I tinted my fondant with a soft lilac and covered the bottom layer, added more white and covered the board and top tier, this automatically adds interest and style to such a simple cake! The flower again was made during a class run by Jenny May and I dusted the petals with a shimmery gold and brown centre. To add some texture to this cake but not to overwhelm the design I did cake lace using a silicone mould I purchased from 'Bake Boss' and the lace is produced by Claire Bowman. It comes in a powder form and you just add water to make a paste and spread it onto the mat and bake it! Wonderful product.
Vendors
Photography - Susie Styler Share a cake by Cake Bites |
- Home
- About
-
GALLERY
- Baby Shower Cakes >
- Baptism Cakes >
- Wedding Cake Ideas >
-
Birthday Cakes
>
- Beauty and the Beast Birthday Cake
- The Pink Mini Machine Birthday Cake
- Princess High Heel Shoe Birthday Cake
- Chilled Out Gardener Birthday Cake
- Ariel Birthday Cake
- Frozen Coronation Tiara Birthday Cake
- Yellow Roses and Lace 65th Birthday Cake
- Surprise Handbag Birthday cake
- Horse Birthday Cake
- Vintage 21th Birthday Cake
- Teddy Bear Two Tier Birthday Cake
- Camper Van Birthday Cake
- Call of Duty Black Ops Game Birthday Cake
- Game Night Birthday Cake
- Giraffe Birthday Cake
- Lace Handbag Birthday Cake
- Whimsical Woodland Birthday Cake
- Animal Theme 1th Birthday Cake
- Frozen Birthday Cake
- Coach Purse Birthday Cake
- Rustic Country Themed Birthday Cake
- Boy Frozen Birthday Cake
- Princess Castle Birthday Cake
- Pirate 1th Birthday Cake
- Koi Fish Birthday Cake
- 3d Rainbow Sponge Minion Birthday Cake
- Carousel Birthday Cake
- Taylor and Wilson Cat Birthday Cake
- Lego Birthday Cake
- Graffiti Birthday Cake
- Tigger 3rd Birthday Cake
- Dual Naked Birthday Cake
- Disneyland Castle Birthday Cake
- Harry Potter Book Birthday Cake
- Georgie's Castle 4th Birthday Cake
- Sweet 13th Makeup Birthday Cake
- Number Blocks Birthday Cake
- \\"Ticketeeboo\\" Yacht shaped Birthday Cake
- Frozen Themed Birthday Cake
- Fairy Doll Birthday Cake
- Boys NERF Birthday Cake
- Sweet 15th Butterfly Birthday Cake
- Superhero Birthday Cake
- Geisha and Cherry Blossoms 40th Birthday Cake
- Fancy Nancy Birthday Cake
- Wildflower Basket Birthday Cake
- The iPhone Birthday Cake
- Under the Sea Birthday Cake
- Finding Nemo Birthday Cake
- Lydie's Pug Dog Birthday Cake
- Alice in wonderland 1st Birthday Cake
- Magical 3D Unicorn Birthday Cake
- Wedding Anniversary Cakes >
- Engagement Cakes >
- Special Occasions >
- Cookies & Cupcakes >
- Tutorials
- Share a Cake
- Blog
- Store


