FOLLOW US
  • Home
  • About
  • GALLERY
    • Baby Shower Cakes >
      • Puzzle Baby Shower Cake
      • Flower Girl Baby Shower Cake
      • Beatrix Potter Baby Shower Cake
      • Bump Baby Shower Cake
      • Sprinkle Shoes Baby Shower Cake
    • Baptism Cakes >
      • SMBC Pink Ruffle Strawberry Baptism Cake
    • Wedding Cake Ideas >
      • Dark Wedding Cake Ideas
    • Birthday Cakes >
      • Beauty and the Beast Birthday Cake
      • The Pink Mini Machine Birthday Cake
      • Princess High Heel Shoe Birthday Cake
      • Chilled Out Gardener Birthday Cake
      • Ariel Birthday Cake
      • Frozen Coronation Tiara Birthday Cake
      • Yellow Roses and Lace 65th Birthday Cake
      • Surprise Handbag Birthday cake
      • Horse Birthday Cake
      • Vintage 21th Birthday Cake
      • Teddy Bear Two Tier Birthday Cake
      • Camper Van Birthday Cake
      • Call of Duty Black Ops Game Birthday Cake
      • Game Night Birthday Cake
      • Giraffe Birthday Cake
      • Lace Handbag Birthday Cake
      • Whimsical Woodland Birthday Cake
      • Animal Theme 1th Birthday Cake
      • Frozen Birthday Cake
      • Coach Purse Birthday Cake
      • Rustic Country Themed Birthday Cake
      • Boy Frozen Birthday Cake
      • Princess Castle Birthday Cake
      • Pirate 1th Birthday Cake
      • Koi Fish Birthday Cake
      • 3d Rainbow Sponge Minion Birthday Cake
      • Carousel Birthday Cake
      • Taylor and Wilson Cat Birthday Cake
      • Lego Birthday Cake
      • Graffiti Birthday Cake
      • Tigger 3rd Birthday Cake
      • Dual Naked Birthday Cake
      • Disneyland Castle Birthday Cake
      • Harry Potter Book Birthday Cake
      • Georgie's Castle 4th Birthday Cake
      • Sweet 13th Makeup Birthday Cake
      • Number Blocks Birthday Cake
      • \\"Ticketeeboo\\" Yacht shaped Birthday Cake
      • Frozen Themed Birthday Cake
      • Fairy Doll Birthday Cake
      • Boys NERF Birthday Cake
      • Sweet 15th Butterfly Birthday Cake
      • Superhero Birthday Cake
      • Geisha and Cherry Blossoms 40th Birthday Cake
      • Fancy Nancy Birthday Cake
      • Wildflower Basket Birthday Cake
      • The iPhone Birthday Cake
      • Under the Sea Birthday Cake
      • Finding Nemo Birthday Cake
      • Lydie's Pug Dog Birthday Cake
    • Wedding Anniversary Cakes >
      • Ruby Wedding Anniversary By the Sea Cake
      • A Racoon Beach Ruffled Wedding Anniversary Cake
      • 50th Golden Wedding Anniversary Cake
    • Engagement Cakes >
      • He asked. She Said Yes Engagement Cake
      • Boots Engagement Cake
      • Gift Box Engagement Cake
      • Purple Ombre Engagement Cake
    • Special Occasions >
      • Spring Cake Ideas
      • Spring Shoe Store Celebration Cake
      • Shirt Father's Day Cake
      • Giant Flowers Graduation Cake
      • A Christmas Ruffles Cake
      • Valentine's Day Creations
      • Swans Valentine's Cake
      • Off To Join The Navy Cake
    • Cookies & Cupcakes >
      • Creme Egg Cupcake Recipe
      • Poker Birthday Cookies
      • Teddy Bear 1ST Birthday Cupcakes
      • Christmas Cupcake Baubles
  • Tutorials
    • Fondant Sea Coral Tutorial for Ariel Birthday Cake
    • Fondant Pink Panther Topper Tutorial
    • Fondant Hello Kitty Topper Tutorial
    • Bright Geometric Cake Topper Tutorial
    • Gumpaste Baby Shoe Tutorial
    • Trigger Happy Skylander Tutorial
    • Free Classes
    • Video Tutorials
  • Share a Cake
    • Share a Christmas Recipe
  • Blog
  • Store

Beatrix Potter Baby Shower Cake


Beatrix Potter Baby Shower Cake


Beatrix Potter Baby Shower Cake

Cake Design, Cake decorating, online cake decorating classes

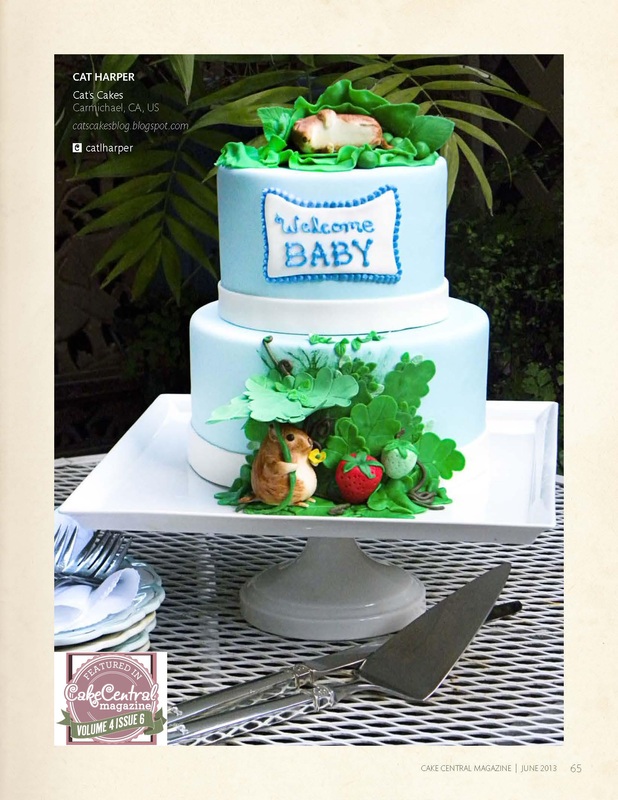
The Story behind this Cake


I started with, what I consider the easy work, the covering of the cake. I hand make my fondant from scratch and let it set up over night before I rolled it out to cover the cake. 

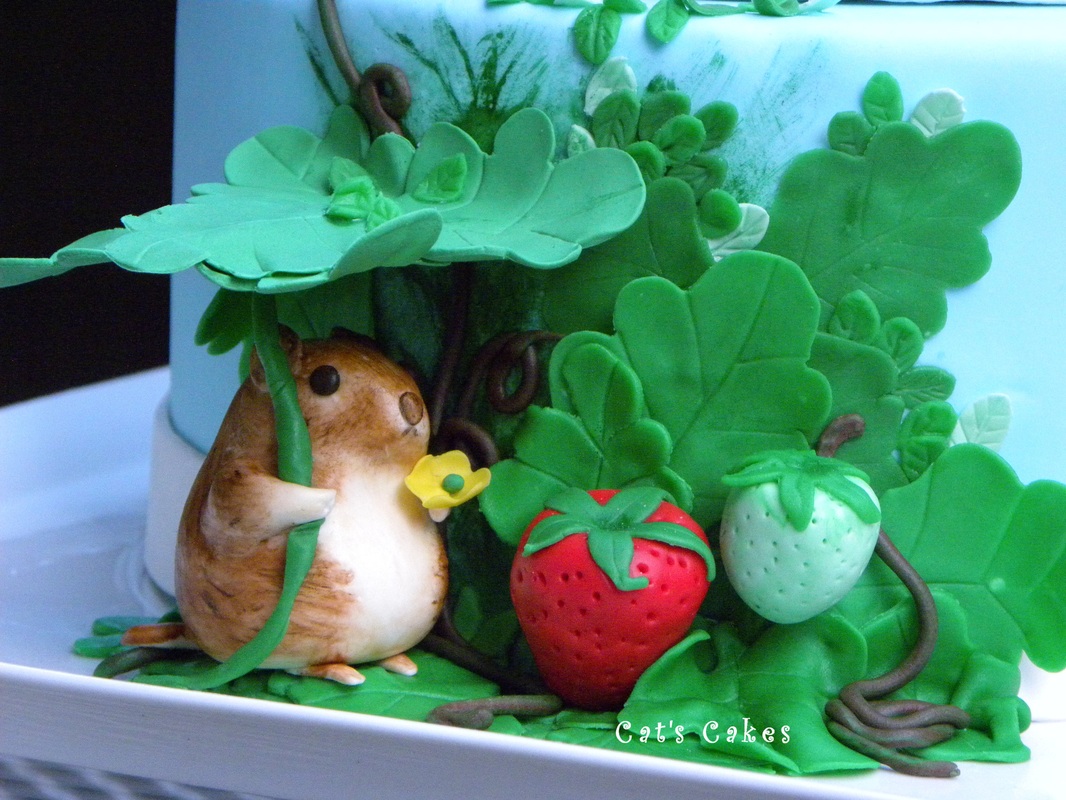
At this point I set it all aside and started working on the mice I would need. I started out with a blob of white fondant that had tylose added to it, which helps it to get harder faster, and just started to work it with my fingers until I had the body shape I wanted for each mouse. Then I took bits and created arms and feet as well as tails. These I smoothed onto the body with a bit of water to act as glue and then let it dry for about an hour. After letting it set up a bit I took a scoring tool and started marking "fur" marks on the body. Then came the painting. This is just food color gel mixed with a bit of clear alcohol till it is a paint consistency.  In this case a watercolor consistency. I mixed up black, dark brown, golden brown and golden yellow paint and started painting the mice in layers of color. I began with the golden brown and then, with a spiky paint brush, added in the dark brown, black and golden yellow bits to create the fur. At this point I added dark brown fondant for eyes and let them sit up over night to dry.

The next morning I covered the cake with the light blue fondant and then trimmed it with white fondant for a clean look. Next came the hand painting for the background. For this I used the same spiky brush I had used for the mice fur.

For the next part I added color to a couple of balls of fondant, making one a darker green than the other, so I could cut out the leaves. Most of these were scored with a fondant tool and added right onto the cake. The leaves needed for the umbrella had a bit of tylose mixed into the fondant first so it would dry nice and hard and then, after they were cut out and scored, I allowed them to dry in a flower form for a few hours. I wanted them to be stiff but not to the point where if I wanted to bend them a bit they would break. At this point I also rolled out the strawberries and let them dry in flower cups. Next came the vines. Once they were on the cake I decided where I wanted to set my mouse and where I wanted the, now dry, strawberries. I set the mouse in place and then added the strawberries to the cake with toothpicks to hold them into place. Then it was time for the part I knew was going to be the hardest...the umbrella. Truth be told, it took me three tries and sets of leaves to get this right. The stem is just floral wire covered in fondant that goes about a quarter inch past the end of the wire and flattens out into a platform. I tried to use this to hold the three leaves but it just wasn't sturdy enough. In the end I used two totally dry leaves and one fresh one that I glued to the side of the cake to help hold it up. The last touch were adding the mini leaves in dark and very light green fondant just to give it a little more texture.
Beatrix Potter Baby Shower Cake
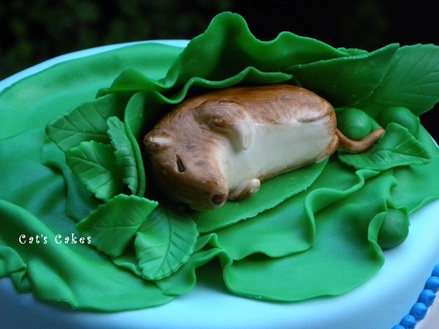
The sleeping mouse was a bit easier. I painted him at the same time as the other mouse and let him dry on his side. The cabbage and pea leaves around him were a bit harder. I needed them to be stiff but not so stiff that they would crack when I tried to place them on the cake. Finally I put down fresh fondant for the cabbage leaves and let one hard taco shell shaped leaf to dry around the mouse for most of the afternoon. Once that was dry I set it onto the cabbage leaf covered top and added half rounds of  leaf shaped fondant to the outside of the "shell". Then I tucked in the "peas" and the pea leaves to finish it.

Share a cake by Cat's Cakes


© shareacake.me.All Rights Reserved

Contact      About 
Photo used under Creative Commons from jamieanne