5 Tier Purple Wedding Cake
|
The Story behind this Cake
At the Royal Adelaide Show this year (2014) I decided to enter the wedding cake, miniature wedding cake and cupcake category to challenge myself to see what I could come up with and heres what I did!
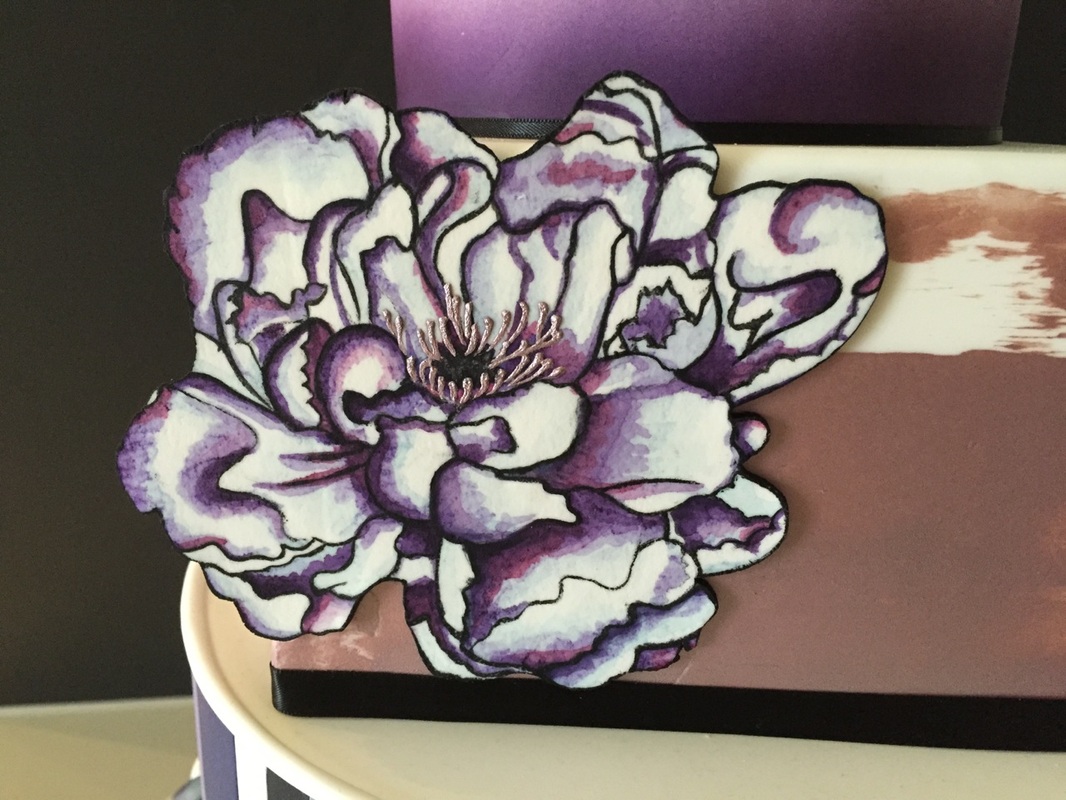
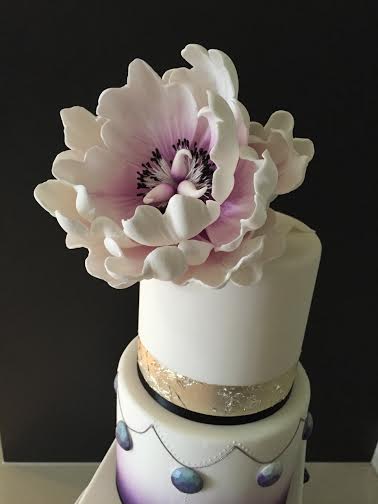
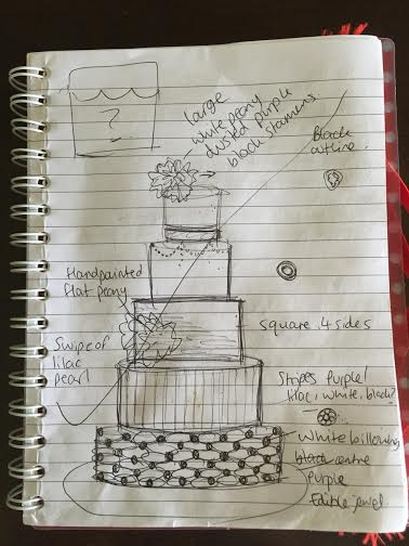
The rules for the wedding cake section this year was to include the colour purple, the cake had to fit within a 18” board and be no higher than 65cm. This is the design I came up with . . .Always try and make a quick sketch of what you want to do to give yourself an idea of how the finished cake will look/if it’s balanced/to busy etc then you can make changes even before you get your tools out! As with my previous blog on ’share a cake’ I love the billowing technique (check it out to see how I achieved it) I had to use it again but this time I made edible jewels for the joins. To make the edible Jewels I used a mould to press individual balls of icing into, set them aside to dry and then sprayed them purple with my ‘dinky doodle’ airbrush and purple colour. Once totally dry I painted them with confectioners glaze to give them a shine like jewels have and so it was still totally edible (you can buy the confectioners glaze from any good cake decorating supply shop) but beware it ruins your brush so don’t use your best brush for this step! The next tier up was simple panels, rolled out using a pasta machine to get the same thickness I passed each colour through and with a ruler as a guide I cut the panels to size before sticking them onto the already iced cake. A thin sausage of icing finishes the top edge nicely. The square tier I did a smear of lilac gel (also purchase from a cake supply shop already mixed and ready to use) as a unique background to showcase the hand painted flat peony flower. I basically did what the chefs do with a puree of fruit/veg, I put a line of the gel on the left hand side of the tier and with a spatula literally swiped it from left to right pushing the gel to the tier! Hope that makes sense! To make the flower I rolled out gum paste cut out the outline shape I wanted and left it to dry overnight! (you can google any picture you like and use it to transfer to your cake) once dry I painted the petals with the same airbrush colour as I sprayed the jewels with and tried to fade the tones of the purple to give the flower depth and movement! The 4th tier I again used my ‘dinky doodle’ airbrush and sprayed using the same purple again but faded it towards the middle of the tier to create this effect. I didn't want a solid purple tier and thought this is a good way of combining the white and purple thats not to overpowering! The top tier I used edible silver leaf to give this cake a bit of wow factor. To achieve the straight edge I firstly iced the cake leaving it to dry overnight then I wrapped a wide ribbon at the desired height I wanted the silver leaf to come up to then applied it onto and slightly over the ribbon! Once complete I then removed the ribbon with any overhanging silver leaf and that gave me the straight edge I was looking for! The large sugar Peony flower was the same as in the previous blog post too but with black stamens and dusted purple to tie the whole cake together! Black ribbon really finished off selected tiers and a large board made the cake sit proud amongst the other competitors I hope you like this cake, the competition was stiff this year so I was really pleased to have placed second for it! Share a cake by Cake BitesMust Have for this Cake
|
- Home
- About
-
GALLERY
- Baby Shower Cakes >
- Baptism Cakes >
- Wedding Cake Ideas >
-
Birthday Cakes
>
- Beauty and the Beast Birthday Cake
- The Pink Mini Machine Birthday Cake
- Princess High Heel Shoe Birthday Cake
- Chilled Out Gardener Birthday Cake
- Ariel Birthday Cake
- Frozen Coronation Tiara Birthday Cake
- Yellow Roses and Lace 65th Birthday Cake
- Surprise Handbag Birthday cake
- Horse Birthday Cake
- Vintage 21th Birthday Cake
- Teddy Bear Two Tier Birthday Cake
- Camper Van Birthday Cake
- Call of Duty Black Ops Game Birthday Cake
- Game Night Birthday Cake
- Giraffe Birthday Cake
- Lace Handbag Birthday Cake
- Whimsical Woodland Birthday Cake
- Animal Theme 1th Birthday Cake
- Frozen Birthday Cake
- Coach Purse Birthday Cake
- Rustic Country Themed Birthday Cake
- Boy Frozen Birthday Cake
- Princess Castle Birthday Cake
- Pirate 1th Birthday Cake
- Koi Fish Birthday Cake
- 3d Rainbow Sponge Minion Birthday Cake
- Carousel Birthday Cake
- Taylor and Wilson Cat Birthday Cake
- Lego Birthday Cake
- Graffiti Birthday Cake
- Tigger 3rd Birthday Cake
- Dual Naked Birthday Cake
- Disneyland Castle Birthday Cake
- Harry Potter Book Birthday Cake
- Georgie's Castle 4th Birthday Cake
- Sweet 13th Makeup Birthday Cake
- Number Blocks Birthday Cake
- \\"Ticketeeboo\\" Yacht shaped Birthday Cake
- Frozen Themed Birthday Cake
- Fairy Doll Birthday Cake
- Boys NERF Birthday Cake
- Sweet 15th Butterfly Birthday Cake
- Superhero Birthday Cake
- Geisha and Cherry Blossoms 40th Birthday Cake
- Fancy Nancy Birthday Cake
- Wildflower Basket Birthday Cake
- The iPhone Birthday Cake
- Under the Sea Birthday Cake
- Finding Nemo Birthday Cake
- Lydie's Pug Dog Birthday Cake
- Alice in wonderland 1st Birthday Cake
- Magical 3D Unicorn Birthday Cake
- Wedding Anniversary Cakes >
- Engagement Cakes >
- Special Occasions >
- Cookies & Cupcakes >
- Tutorials
- Share a Cake
- Blog
- Store


